Pages

1.23.2016

at 3pm | jen faith brown photography


Three o'clock in the afternoon around our home is basically a chill-out time. We will have just walked through the door from school pick-up (pick-upS depending on the day) and the boys want to immediately head to the wii or ipad. On this particular day I would love to say we played for a while because it was rainy and cold, but this is our typical day. So, whatevs. After everyone has their turn with their device of choice, then it just time to hang out and play until dinner. Every once in a while I throw in a chore of having them unload the dishwasher for me for good measure. And really that is just because I don't want to do it so I have them pitch in by doing it for me. Today was not one of those days. Since it was rainy I only took photos of the wii/ipad time on this particular day however, the next day I was upstairs with the boys in the playroom. I looked out the window and exclaimed 'Look what I see!!'. John said in a very unimpressed tone 'The light. You are going to get your camera'. They know me so well by now! So I dragged out the tripod so I could be in the photos as we read books on the couch. I swear these look posed, but they aren't. Matthew really is that snuggle-y and you can see why I get excited when we are in there at the exact right time- the light is perfect! After we read books I handed the camera over to Matty B for some diaper changing documentation. And that about sums up a typical 3:00-4:00ish day at our house! Nothing spectacularly exciting but it is still fun to capture these small moments.

These photos are part of a documentary blog circle, Documenting Our Days. Be sure to see Hannah's post by clicking HERE. She is amazing so you don't want to miss out!


 Remeber to head to Hannah's blog by clicking HERE.

Jen Faith Brown is a family photographer specializing in storytelling family photography session, either in home or on location. Jen is married with three young sons who keep her quite busy and give her abundant practice in photographing always-moving children! Jen is now booking 2015 sessions in Flower Mound, Southlake, Highland Village, Lewisville, Coppell, Frisco, and surround DFW areas. Please visit www.jenfaithbrownphotography.com for pricing and to view sample galleries.

1.21.2016

A Composition Tip | jen faith brown photography


For those of you who live here in Flower Mound, I am teaching a free beginner's photography class at the Flower Mound Library on Jan 30. There are about a million things I could talk about but I am having to pick my favorite tips for people who want to quickly improve their photography and take meaningful photos of family life. So, since I can't touch on all my favorite things for photography there, I thought I would take a minute to share a tip here on the blog today!

Two of my favorite composition tools are framing and shooting in different angles. I also love leading lines but just won't be able to squeeze that in next weekend during the class. So, here is a smidge of info on leading lines in your photos. Leading lines are exactly what you might think they would be- lines in the photo leading your cute little eyeballs around, ideally leading to your subject. One reason I am not going into detail on the subject in my class is because it isn't as easy to right away especially compared to framing and shooting at different perspectives. At least for me it took some practice to getting the hang of it and being on the lookout for it when photographing my kiddos.

So let's just look at some examples, shall we?

In this example, the edge of the pool is a leading line which guides is right to my husband who is listening to an enthralling story as told by Matty B. To take this, I had to get pretty low to the ground (and not topple into the pool!).


The movie chairs serve as a leading line to the boys getting ready to see a movie, as does the lights along the stairs.


Paths are great ways to get a leading line in your photo.

By taking this photo slightly to the side of Thomas, the pole is a leading line to him at a Halloween party.

The shoreline is a leading line to Thomas at the lake on a foggy morning.


Here the ropes are leading lines to the boys on their swing.


To me, the curb and sidewalk are leading lines in this photo and lead us to the people. I also think the line of people is a leading line to the ice cream truck.


The outstretched arms here are leading lines to John John getting ice cream, along with the line of the curb.


 The line of pottery leads us to Allison shopping for clients. And I bet if I went through my photos I have the same version except with Al in focus instead of the pots!


An exaggerated lighting scene can give leading lines. I plopped T Bone here and tried to get him to sit still for at least 5 seconds for the photo!


The grout lines in the tiles lead us right up to the little girls in their boots. I am pretty sure I had the camera on the ground for this photo.


Here the ice cream freezer leads us to the family. Getting the camera close to the freezer helps with this photo.

Lastly, another edge of a pool leads us to some silly antics.


I hope this helps a little and gets at least the thought put in your head to be on the lookout for making more powerful photos with leading lines! And remember to come out to my class on Jan 30 if you are close by!


Jen Faith Brown is a family photographer specializing in storytelling family photography session, either in home or on location. Jen is married with three young sons who keep her quite busy and give her abundant practice in photographing always-moving children! Jen is now booking 2015 sessions in Flower Mound, Southlake, Highland Village, Lewisville, Coppell, Frisco, and surround DFW areas. Please visit www.jenfaithbrownphotography.com for pricing and to view sample galleries.

1.17.2016

5 Tips on Being in the Photo | jen faith brown photography


This year I have started a personal project '52 Weeks of Me'. I will take at least one photo a week with me in it. This is the third week in and so far so good! I am just like almost every woman in that there are plenty of times I am self conscious about being in the photos. However I am going to power through and be in the photos anyways! Today I am going to share 5 tips on getting in the photo either by yourself or along with loved ones.

1. Shoot in the Shadows
There are plenty of times that I don't feel 'photo ready'. My hair is a mess, I am still wearing my workout clothes from my 5am bootcamp, and I still haven't lost those last pesky 30 pounds. Well, one day I saw one of Blissful Maven's photos on facebook and realized since that particular boudoir photo was so moody and in the shadows that I thought to myself 'I would be comfortable having her take my photo in almost no clothes because most of my body would be hidden in the shadows anyways'. So I am taking that thought and applying it to my 52 Weeks of Me. Last week I knew I wanted a photo of Matthew giving me his usual hugs and cuddles but I was looking a hot mess. So I found a good spot in my bedroom that had shadows to hide most of myself and took the photo.


2. Take 3 Minutes to Throw on Some Make-up
Some of you are blessed to have gorgeous faces sans make-up. However, even though I usually wear very minimal make-up, I always feel prettier with it on and would be more willing to in the photo if I was wearing make-up. This past weekend we took a short hike to enjoy the great outdoors. I quickly filled in my brows (because they are a tad sparse from over plucking in my younger days!) and put on some mascara. Brad commented 'getting all gussied up for the trails?'. Um. No. I am making it so I am comfortable being in the photos instead of thinking to myself 'ugh. I look awful without a drop of make-up on so I am not even going to be in the pictures'. And you know what, if you don't have make-up on and you are super duper self conscious, don on a pair of sunglasses!


For quick make-up tips, I consulted with my friend Nicki of Nicki Marie Gazlay Hair and Make-up. According to the pro, she said to load up on mascara to make your eyes pop and throw on a quick application of fun lipstick (think hot pink, coral or red) to instantly brighten up your face. That sounds easy enough and surely we can all manage to do that minimal prep if it means we will feel more comfortable in front of the camera.  Plus, look how gorgeous she is in her family photo so she knows what she is talking about!


3. Wear your Favorite Clothes
If there is even a possibility that I might be in the photos, I try to wear some of my favorite clothes that I know are flattering, or at the very least don't make me look like I weigh 300 pounds or like a dorky mom. Going out with the family on the weekend? Skinny jeans and a cute top. Christmas morning? Wear the pjs without holes in them (and yes, wear a bra!). All else fails take a close up where you can't see that you are wearing a shirt smeared with your three year old's snot, tears, and lunch remnants.


3. Throw Your Hair in a Cute Bun
Once again Nicki has inspired me to do more with my hair than simply put it in a pony tail. She taught our MOMS Club how to do a messy bun and then I looked on Pinterest for ideas on curly hair up do's. Find a simple hair style that you can do in a matter of minutes (and with about 10 bobby pins!) for the days that you didn't wash or fix your hair. For me, curly hair isn't all that easy to do if it isn't wet. I can't exactly run a brush through it. So, Nicki's tips of twisting pieces back to a messy bun and really helped me look more put together for photos. Nicki is like a miracle worker for hair!


4. Give up Some Control
I can't always be the one taking the photos if I want to be in them. So, I have to give up some control by handing the camera over to my husband or even my sons. Will the photos be perfect? Probably not. Does it matter? Nope. If you shoot in manual, dial in the settings and accept that you get what you get and you don't throw a fit.


5. Make a List 
Lastly, keep a running list of things to photograph so you don't have to think about it and you don't have a chance to talk yourself out of it. On those days you aren't feeling inspired or creative, refer to your list and just take the photo. Here is a list I started that you are welcome to save and add your own ideas.


I hope these tips were helpful! I would love to know what you do to encourage yourself to be in the photos more often.


Jen Faith Brown is a family photographer specializing in storytelling family photography session, either in home or on location. Jen is married with three young sons who keep her quite busy and give her abundant practice in photographing always-moving children! Jen is now booking 2016 sessions in Flower Mound, Southlake, Highland Village, Lewisville, Coppell, Frisco, and surround DFW areas. Please visit www.jenfaithbrownphotography.com for pricing and to view sample galleries.

1.12.2016

Cell Phone Basics

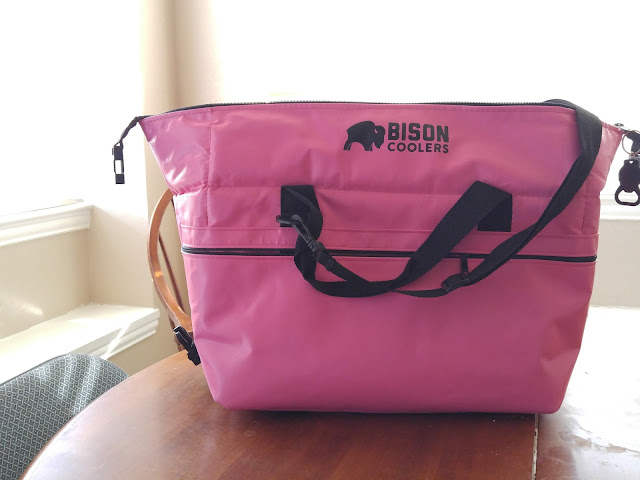
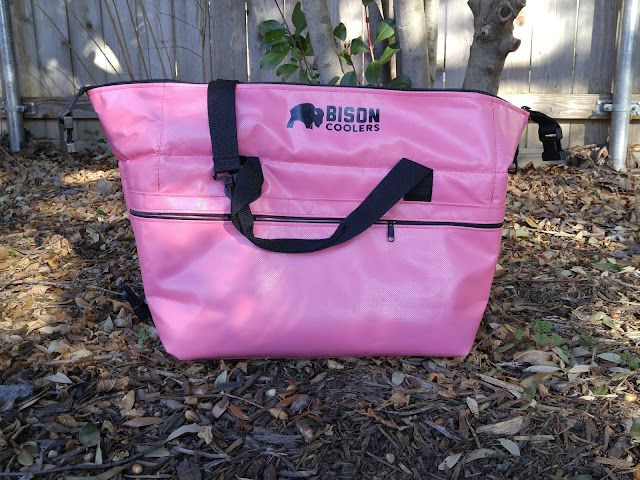
Seeing as many people use their cell phones for photos, today I am going to give a couple quick (and I mean QUICK) tips on some basics of getting better photos with cell phones. For purposes of demonstration, I quickly took a couple photos of my Bison Coolers soft pack and did not edit any of these photos. I didn't even really think about composition, so this is really just bare bones here!

1. Tap on the photo to change lighting.
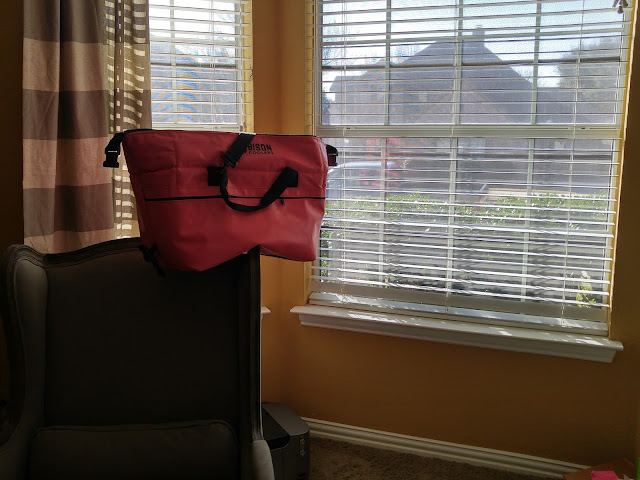
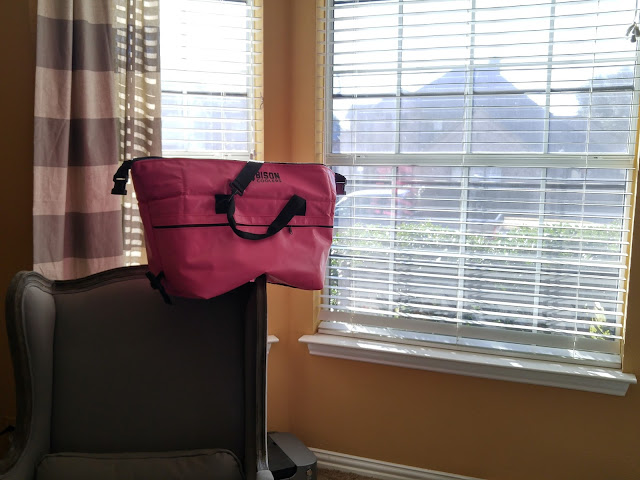
This first photo is mostly lit from behind (back lit) which will make the front of the cooler darker. Usually when you a subject is backlit, it will look like a dark silhouette. For this photo I had enough light coming from in the house that it wasn't super dark, but if you try something like this at home your photo might be much darker. Either way,  I tapped on the screen in a dark area of the cooler to lighten it up. I touched the screen where the dark strap is to lighten it up. This will help in back lit situations or in really bright situations. (You can touch on a bright part of the photo to darken the overall picture). My cell phone has HDR available which will also help even out photos that are really bright or really dark. However not all phones will have that, so tapping on the photo in light/dark areas will help even out exposure. Also HDR will probably not be as helpful with moving subjects as it takes two photos (one exposed for the bright areas and one exposed for the dark areas) and merges them together. So if someone is running across the frame, there is a chance they will be blurry since the camera is essentially taking two photos of them a second or two apart.


Now, I don't think you would ever want to put a cooler on a chair like this, but let's pretend this was the shot you were looking for. You can see the difference here in the grey chair. The first photo was dark so I tapped on the screen where the grey chair is and the photo was lightened up.


2. Look for open shade when photographing outside.
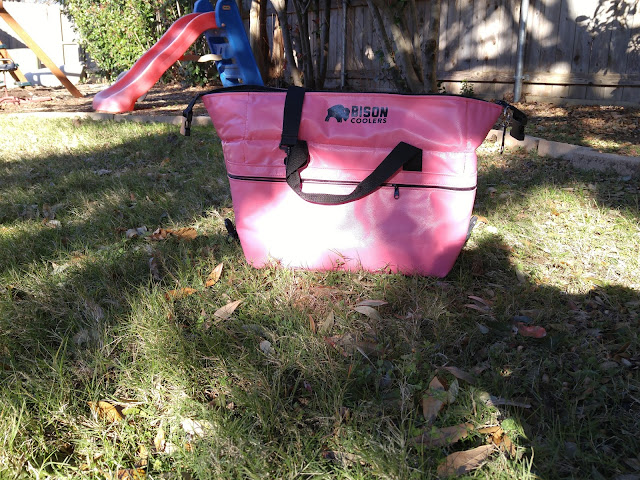
For a photo to come out clean and crisp, the camera needs lots of light. Luckily being outside will provide lots of natural light. However, you still need to think about how to best use that light available. One best way is to place the subject in open shade, meaning a shady area but still facing the sunlight. In this first photo, you can see that the cooler is in the bright sun with uneven lighting. If I moved it back just a couple inches as in the second photo, the lighting is much less harsh and looks nicer.


Also be sure to look for even shade, not spotty.  This first photo is in dappled light, which can be very cool if done well. This one is not done well and just looks like I haphazardly placed the cooler on the ground (which I totally did!). The second photo is moved to a spot with more even shade. Remember to still have the subject facing the sun so it will be lit nicely.


3. Pull your subject away from the background. 
To help give a little depth to your photos, pull the subject away from the background. This first photo is right up against the bricks with no breathing room. The second is pulled away about 3 feet and gives more depth to the photo. 


Pulling the subject away from the background will also help to give a more blurry background naturally. Editing in a blurry background can make your photo look fake and should be used lightly. If you get it right in camera, then you won't need to worry about editing it later! Notice the fence and kickball is much more blurry in the first photo than the second because of the distance to the fence. I also held the camera pretty close to the 'bison coolers' label, and tapped on the screen to focus on the lettering, to take these photos. That will also help get a blurry background. Even the grass in the first photo is blurry because I told the camera to focus on the lettering by tapping on the screen. Usually a little green box will come up where you tap and that is setting the focus point. 


Jen Faith Brown is a family photographer specializing in storytelling family photography session, either in home or on location. Jen is married with three young sons who keep her quite busy and give her abundant practice in photographing always-moving children! Jen is now booking 2015 sessions in Flower Mound, Southlake, Highland Village, Lewisville, Coppell, Frisco, and surround DFW areas. Please visit www.jenfaithbrownphotography.com for pricing and to view sample galleries.